How do I love container gardening? Let me count the ways.
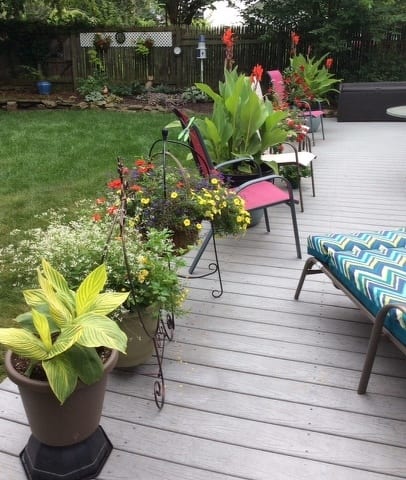
Any container adds a burst of color to ‘blah’ places such as decks, front stoops, back kitchen entryways, in between garage doors and in front of unsightly garden sheds.
They are more portable than plants put into the ground, so they can jazz up a sad looking flower bed whose shrubs and perennial flowers may be spent. It’s easy to pop some cheery containers into empty spaces or hang them on fences.
Containers can be a solution in areas of a yard that are challenging. For example, I have a large black walnut tree in my yard. Planting anything under it creates a headache because it gives off a substance called juglone, creating a virtual dead zone as far away as the drip line. Juglone is toxic and growth-stunting to many plants. I have managed to mostly alleviate the problem by using basket containers mounted on poles about five feet above the ground while trying to coax a ground cover of sedum. This area is now interesting and colorful rather than dull and bare.
However, the best reason of all for growing container plants is that they can supply a variety of plants to a wide range of places, both ornamental and edible, without dealing with garden soil issues like digging up pesky rocks, poor drainage or other bedding problems.
What’s needed to get started are containers, plants and soil. These three synchronize to create a gardener’s own personalized idea of perfection.
First, the container. The choices here are almost unlimited. In gardening magazines, I’ve seen everything and anything used as plant containers – wash tubs, boots, watering cans. I even saw a vintage oak dresser!
No matter what the container, each is composed either of concrete, terracotta, wood, cast-iron, sheet metal, a lined basket, glazed pottery or a lookalike (these may look like one of the other kinds, but are actually made from things like resin or plastic). They can range greatly in price, some expensive, unless they’re bought at flea markets or yard sales.
I’ve used most of the materials and found that my over-all favorite is resin. Resin containers are less expensive, lighter weight and hold up over many Centre County winters, even if left outside. I have a large metal urn that is weighty, rusty and heats up in full sun, requiring a bubble wrap liner to keep plants from frying; a resin product has none of those drawbacks.
I always look for a container that has a drain hole in the bottom. If it doesn’t, no matter how carefully the amount of watering is watched, eventually the roots can rot because of too much moisture.
The next part is the most fun — shopping for plants. Where are the best places to go? The truth is, containers need to start with the healthiest plants possible, which means shopping while the selection is best, around mid-May. Healthy plants can be found at many places — home improvement stores, plant sales, garden centers or one of my favorites, the off-the-beaten-path nursery.
I always try to check plants for things like irregular growth, poor watering, environmental stress and healthy roots (yes, you can tip a plant out of a pot to check the root growth). I also want a plant that isn’t in full bloom to enjoy the full blooming cycle, and one that is the size I need now and not necessarily the one that will “grow into” the pot. Some never do.
When selecting plants, I go for those that have interesting foliage, not flowers. I consider the flowers a bonus. I take my pot to the store, if possible, and try out various color combinations, always looking for plants that have similar water and light needs so they all have the best chance of survival.
The next step is arranging the plants in the containers. A classic formula is having a focal point plant, some trailing plants, and others to fill in (the “thriller, spiller, filler” idea). An example for a 16-inch container might be a purple fountain grass (thriller), three sweet potato vines (spillers) and three each of coleus, petunias and calibrachoa (fillers). However, there are other design combinations, like having one or two showy plants in a smaller pot, which can work just as well.
There is one last purchase before the containers are ready to plant. That final shopping choice is a good quality soilless potting mix, one that is light and fluffy. Some have additives like time-release fertilizer (OK, though you may still have to add fertilizer later) and water-grabbing crystals (not proven to greatly benefit, from what I’ve read). Some people make their own, and there are lots of good recipes online.
Finally, the planting. First water is added to the potting mix to moisten it; it will be easier to work with. I use an unbleached coffee filter or two to cover the hole in the bottom of the pot so that the soil will not easily come out when the container is watered.
Since most plants need no more than 6 to 8 inches of soil in which to grow roots, in large containers I crush some empty clean plastic water bottles and use them as space fillers to reduce the weight. I fill the container up to the two-thirds mark with potting soil and rehearse the plants in different positions while still in their pots.
Once my decision is made, I ease the plants out of their pots and transfer them into the container. I loosen any roots that have begun to circle the bottom of the root ball and squeeze each root ball if necessary to fit into the pot, adding soil so the plants sit at the same depth they were growing before.
I sprinkle some slow release fertilizer (like Osmocote) on top and apply another bit of soil, water well and add more soil if necessary to top it off.
Newly planted containers are like pets. They will need daily loving care (watering and fertilizing, as needed), but they will certainly add to the growing allure of any garden.


