
As a child, one of the things that I loved was helping my mom and my grandmother bake Christmas cookies. I remember being in first grade and my mom letting me pour a bag of semi-sweet chocolate chips into cookie batter, helping her roll cookie dough into balls, or grandma letting me use the cookie cutters for sugar cookies – and then the most fun of all – decorating them.
As I grew older, my “helping” increased and by the time I was in junior high, I had somehow been designated as the chief cookie baker. Since then, I often bake cookies to give as gifts to family, friends and neighbors for Christmas.
This is something that I have done for decades. Not only have I baked cookies for Christmas, but also for baby showers, bridal showers, and weddings. Two years in a row, I used three vacation days from work to bake dozens and dozens of cookies in sweltering August heat to make a Pittsburgh Cookie Table for my son’s wedding and a year later for my stepdaughter’s nuptials.
When I was trying to decide what to publish in this week’s edition of Flavor & Fun, I remembered a former co-worker who was a longtime reporter at a daily newspaper in Clearfield where I spent ten years as the editor. She was not only my employee, but one of my best friends. She was an amazing cook and baker, and she wrote a column for our Food Page every other week. “Cooking with Dianne” was very popular.
Every year, Dianne would spearhead the newspaper’s annual Cookie Contest, with readers bringing us a dozen of their home-baked Christmas cookies along with the recipe – and our county commissioners would arrive to be the unbiased cookie judges by sampling every entry. Winners had their photo and winning recipe published in Dianne’s column. Dianne and I shared our favorite holiday recipes every year, often trying out new recipes on our husbands. (If a new recipe passed the Husband Test, we knew it was a winner.)
Unfortunately, shortly after I left there in November 2024, my dear friend Dianne suffered a massive cardiac event in the newsroom in January 2025, only a few weeks after her 63rd birthday. I am pleased to know, however, that her memory lives on because that publication now re-publishes archived columns in her honor.
So, to honor my dear friend Dianne, who I miss terribly, and in the spirit of the Holiday Season, I thought I’d share some of my very favorite cookie recipes that she and I shared for many years.
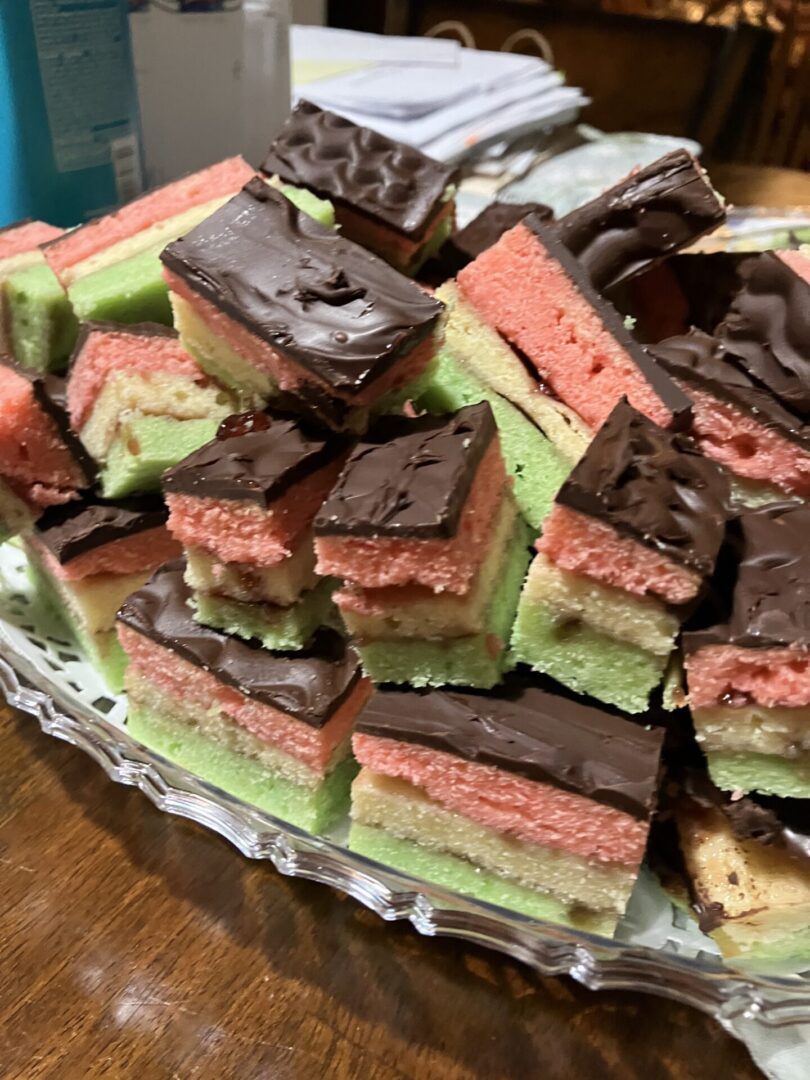
Italian Rainbow Cookies
Ingredients:
- Nonstick baking spray
- 2 c. unsalted butter, softened
- 1 ¾ c. + 1.5 T granulated sugar, divided
- 6 large eggs, separated
- 1 T almond extract
- 1 tsp. kosher salt
- 3 ¼ c. all-purpose flour
- Red and green food coloring (paste is best)
- 2/3 c. seedless raspberry jam, divided
- 2 c. semisweet chocolate chips
Directions:
Preheat oven to 350 with oven racks in the upper and lower third. Lightly grease three 9×13 baking pans or quarter sheet pans with nonstick baking spray and then line the bottoms with parchment paper. Set aside
Beat the butter and 1 ¾ c. of sugar on medium speed until well combined in the bowl of a stand mixer with a paddle attachment, about three minutes. With the mixer on medium speed, add the egg yolks one at a time, beating well after each addition. Stir in the almond extract and salt. With the mixer on low, gradually add the flour and beat until just combined. Set aside.
Beat the egg whites with a handheld mixer on medium-high speed until foamy in a large bowl, about 30 seconds. Continue beating, gradually adding the remaining 1.5 T. of the sugar and beating until stiff peaks form, for about 1-2 minutes.
Fold 1/3 of the egg whites into the batter with a rubber spatula until just combined. Fold in the remaining egg whites just until the batter is smooth and fully combined.
Divide the batter evenly among three medium bowls. Add 3 to 4 drops of red food coloring to the first bowl, and 3 to 4 drops of green food coloring in the second bowl. Leave the third bowl white. Fold the food coloring into the batter to evenly color each one.
Spread each batter into the prepared baking pans, keeping colors separate. Bake until the cakes are set and dry on top, 14 to 16 minutes. Cool the cakes completely in the pans, for about 30 minutes.
Turn the green cake layer out onto a parchment paper lined baking sheet, peel off the parchment paper on the bottom side of the cake and discard. Spread the top of the cake evenly with 1/3 cup of the jam. Invert the red cake layer directly on top, discard the parchment paper, and cover the top evenly with the remaining 1/3 cup of the jam. Invert the white layer directly on top of the red layer and then cover the top and sides of the cake with plastic wrap. Chill for at least 30 minutes.
Unwrap the cake. Melt the chocolate in the microwave in 30 second intervals until the chocolate is almost smooth and some unmelted bits remaining. Stir until the residual heat fully melts and is smooth.
Spread about half of the melted chocolate evenly over the top of the cake. Refrigerate until the chocolate is set.
Invert the cake onto a cutting board and discard the parchment paper. Remelt the remaining chocolate in 15 second intervals until smooth, spread over the top of the cake, and using a fork, crate long wavy patterns across the chocolate. Chill until set.
Warm a large chef’s knife under hot water and dry. Cut the cake into about 24 rectangle pieces, warming the knife after each slice.

Cream Cheese Cookies
Ingredients:
- One box chocolate or vanilla cake mix
- 1 8 oz. block cream cheese, softened
- 1 egg
- 1 stick butter or margarine (1/2 cup), softened
- 1 tsp. vanilla extract
- Non-pareil candy or any candy of choice
Preheat oven to 350. Line cookie sheet(s) with parchment paper.
Combine cream cheese, butter, egg and vanilla in a large bowl with an electric mixer until well combined. Make sure cheese and butter are at room temperature. Slowly add cake mix. You may have to combine by hand as the texture becomes quite stiff.
Roll into balls about the size of a walnut. Bake for 10-12 minutes. Cookies will puff up and be rather soft. Remove from oven, let sit on your cookie sheet for a minute or two.
Press non-pareil candy of your choice into center. Transfer cookies to cooling racks. Cool completely and let candy harden before storing.
Editor’s Note: Coordinate the candy to the to the flavor of cake mix you wish to use. Chocolate candies go well with chocolate or white cake mix. Mint non-pareils are wonderful with white or yellow cake mix. Mint thins are great with chocolate. Also consider using M&Ms, Rolos, or any other candy of choice. Cookies can also be rolled in fine colored sugar before baking for extra color.
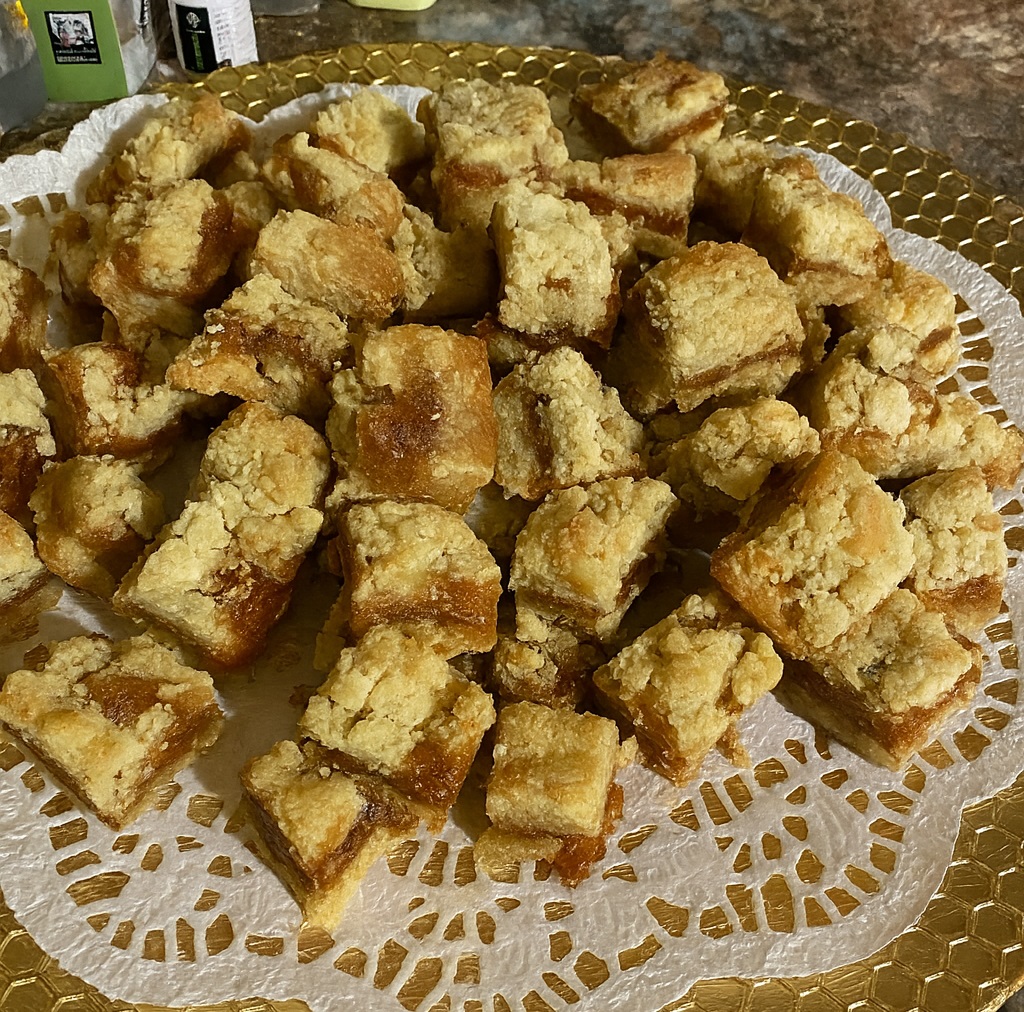
Salted Caramel Bars
Ingredients:
- 2 cups butter, softened
- 1.5 cups confectioners’ sugar
- 1 cup sugar
- 6 tsp. vanilla extract
- 4 cups all purpose flour
- 1 package (14 ounces) wrapped caramels OR 1 bag of Kraft Caramel Bits
- 1/3 cup heavy whipping cream
- 1 tsp kosher salt
- 1 package (12 oz) dark chocolate chips
Directions:
Preheat oven to 325.
Beat butter, sugars and vanilla until light and fluffy, about 5-7 minutes. Gradually beat in flour, mixing well. Press 3 cups of dough onto bottom of 13×9 pan. Bake until set, about 20-22 minutes.
Cool 10 minutes on wire rack.
While dough is cooling, melt caramels with cream in a small saucepan over low heat until smooth. Pour over crust. Sprinkle with salt, then chocolate chips. Drop remaining dough by teaspoonfuls over top. Bake until light golden brown, 30 to 35 minutes longer. Cool completely on a wire rack. Cut into bars when cool.
Editor’s Note: These bar cookies are just as delicious without chocolate.


